How To Make A Picture Frame

Picture frames are cheap and easy to make with the right tools. Follow our step-by-step guide on how to make a picture frame and add this skill to your DIY repertoire.
Buying the materials
When ordering the timber check there’s enough to go around the picture plus eight times the width of timber for the mitres.
For light frames smaller than A3, reinforce mitres with nails skewed through them and add framing staples at the back. Use glazing push pins to secure 3mm thick MDF backing.
TIP Buy a framing kit from a hardware store that includes clamps, staples and pins or buy them individually.
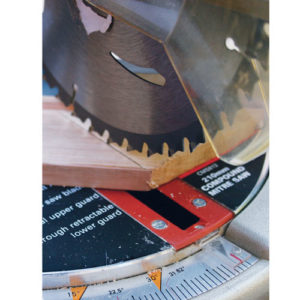
Step 1. Cut the frame sides
Mark the frame sides to length, using a combination square to mark the mitres. Set the mitresaw to 45° and cut each side to length.
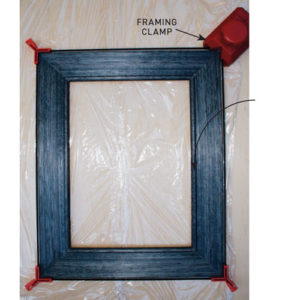
Step 2. Assemble the frame
Apply PVA adhesive to the joining surfaces, clamp then check for square.
TIP Put plastic wrap underneath to prevent the frame sticking to the bench
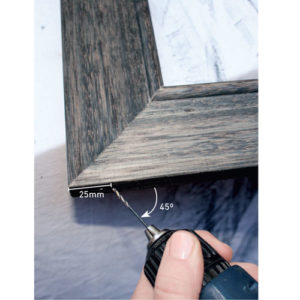
Step 3. Reinforce the corners
For each mitre, measure 25mm from the corner to drill a 1mm hole skewed at 45°, securing with a 40 x 1.6mm bullethead nail.
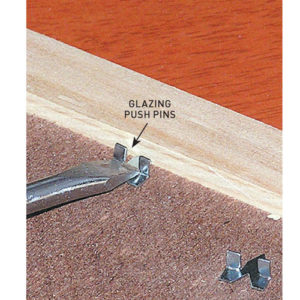
Step 4. Secure the backing
Position the glass, picture and backing in the rebate, securing with at least three glazing push pins along each side.

Click on the diagram
Follow the labelled diagram.
Vote It Up:

Points: 0