How To Install A Built-In Barbecue
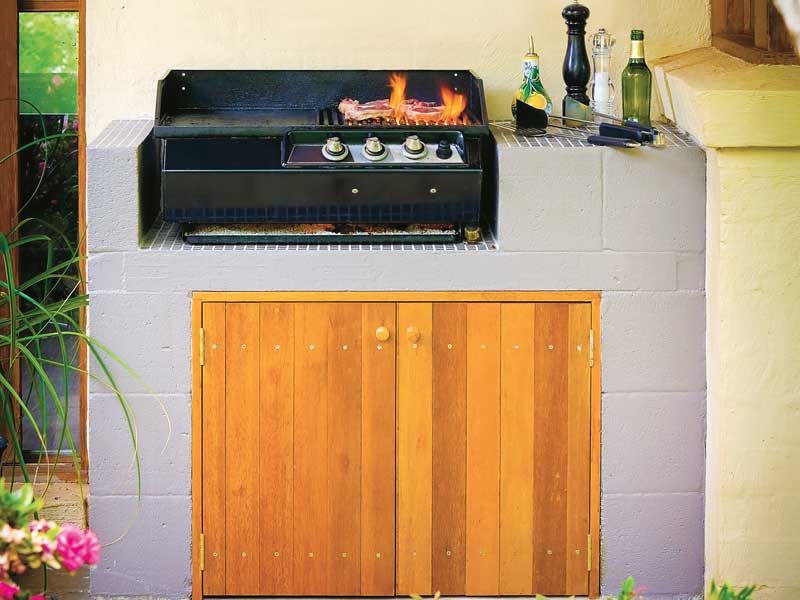
This barbecue originally sat on a wobbly cart, which made cooking difficult and caused the oil to pool in a corner.
The new built-in bench is made from special concrete blocks that have been clad with tiles, with meranti doors added to conceal the gas bottle underneath.
Using Hebel blocks
Hebel autoclaved aerated concrete (AAC) is a lightweight, heat-resistant material. The blocks and panels are easy to lay and after the firstm course is levelled, the rest are secured with a 3mm bed of adhesive.
To cut Hebel, use a handsaw and wear a respirator, safety glasses, long sleeves and gloves.
Tile the panel and side blocks by spreading tile adhesive and laying the tiles. Mix grout and push it into the joints with a squeegee, then wipe clean when dry.
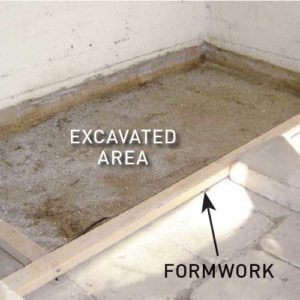
Step 1. Pour a concrete slab
Excavate the area to 100mm deep and position the formwork. Mix quickset concrete and pour the slab, screeding the surface with a sawing action across the formwork. Follow with a steel float to create a smooth finish and leave to dry.
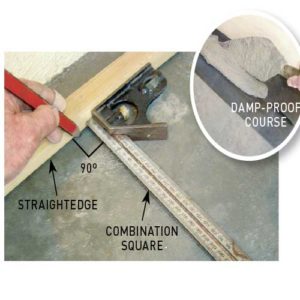
Step 2. Add damp-proof course
Use a combination square and straightedge to mark out the bench. Roll out a layer of aluminium damp-proof course (DPC) where the Hebel block courses will be laid, creating a slip joint between the blocks and the concrete.
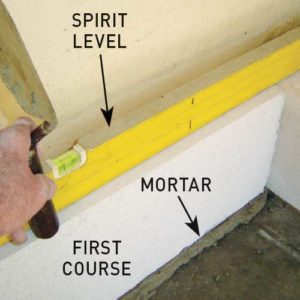
Step 3. Lay the first course
Use a brickie’s trowel to spread mortar 10mm thick over the DPC, then tap the end blocks of the first course into position. Apply adhesive to the butting ends of the back blocks using a notched trowel, lay them in position and check with a spirit level
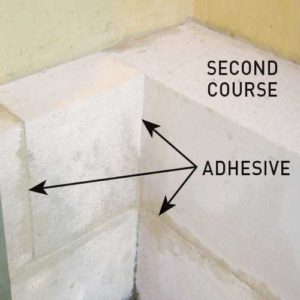
Step 4. Lay Remaining Courses
Position the blocks of the second course mirroring the first course, staggering the vertical joints between the blocks. Apply adhesive to all joints, tapping the blocks to close the vertical joints to 2mm. Lay the third course to match the first course.
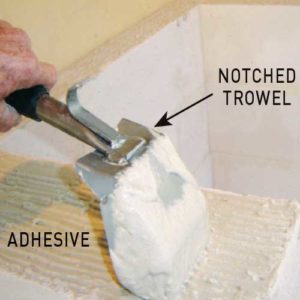
Step 5. Bed burner panel
Check the 75mm thick panel against the blocks of the third course and adjust if necessary so the panel fits neatly. Use a notched trowel to apply adhesive over the third course, then bed the panel on the adhesive, tapping to make it level.
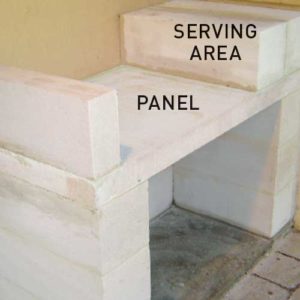
Step 6. Add side benchtops
Apply adhesive to the panel and two 600 x 200 x 200mm blocks, then secure them to one end of the panel, forming the serving area. Use adhesive to secure a 600 x 200 x 100mm block at the other end of the panel, leaving a 700mm gap for the barbecue.
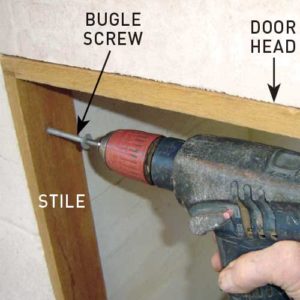
Step 7. Attach door frame
Use a router to cut an 18mm wide x 5mm deep rebate on each end of the door head, then secure it to the stiles using adhesive and screws. Drill clearance holes through each stile and secure the frame to the blocks using 100mm x 14g galvanised bugle screws.
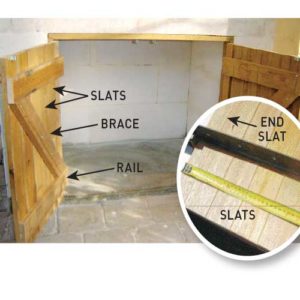
Step 8. Make and hang doors
Use a circular saw to cut the end slats so the doors fit with a 3mm gap on the sides and a 2mm gap between. Edge-laminate the slats using clamps and adhesive. Use screws to secure the rails and braces, then align the hinges with the rails and hang the doors.
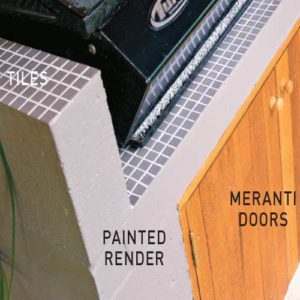
Step 9. Apply render & tiles
Scrape down the blocks, mix Hebel HighBuild render to a creamy consistency, apply 3mm thick, sponge for a bagged finish and leave to dry. Apply sealer and two coats of exterior acrylic, then tile the top, including the panel under the barbecue.
Vote It Up:

Points: 0

