How To Install An Aluminium Fence
The new owners bought this semi-detached house as a rental property, so naturally wanted to maximise their return without overcapitalising on their investment.
By carefully considering their budget and making clever decisions about how and where they spent their money, they managed to do just that and the property now presents well.
A big priority for them was to provide prospective tenants with privacy and security.
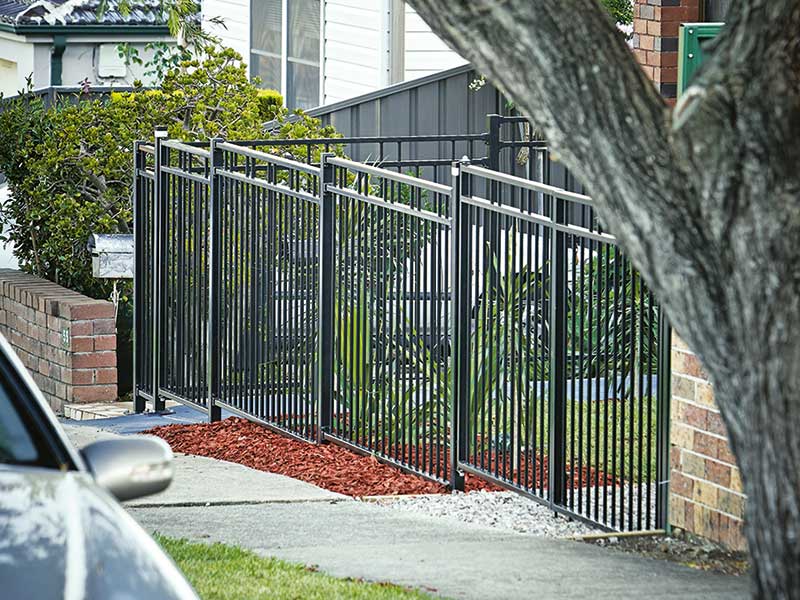
Installing aluminium fence panels in the front yard and adding driveway gates achieved this goal, and was also a quick and easy job to DIY.
Throw in a little inexpensive landscaping and the house no longer looks run-down but has kerb appeal.
DIY TIP To cut aluminium fence posts to length, use a 1.5mm stainless steel grinding wheel for a clean cut, or use a hacksaw.
Choose the style
Fence panels with a double top rail design from Protector Aluminium were chosen by the owners. These can be ordered through their website Protector Aluminium.
Protector offer numerous different fence styles through the Special Orders desk at Bunnings, but a couple of styles are kept in stock, so you can buy off the shelf to get started right away.
All other components were off the shelf, which is great when you need to pick up a few extra screws or a post as we did.
This fencing system is simple and inexpensive. That means you won’t have any trouble tackling it with tools you probably already own. And better still, you won’t have to call in tradies or spend days getting it done.
Nuts and bolts
Ramset anchor studs, chemical anchors and adhesives are a great alternative to Dynabolts in applications where they are unsuitable, such as when working with path edges and hollow bricks.
Set the posts
We were setting posts on existing concrete paths and new footings, so chose ones with a base flange.
The 1300mm posts allowed for stepping between the fence panels on sloping ground. Align with a stringline and mark the positions on existing surfaces.
Grind the concrete level to accept the flange, if necessary. Protector recommends fixing with stainless steel Dynabolts, which rely on compressing the anchor within the masonry.
We risked breaking out the side of the path so used 10mm Ramset galvanised anchor studs and adhesive instead.
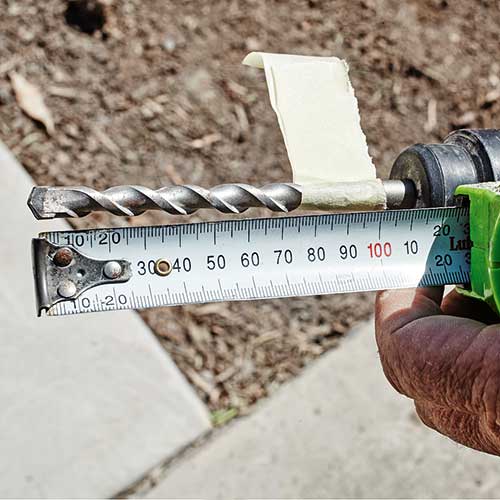
Drill 12mm x 90mm deep holes for the studs.

Align with a stringline and mark the positions on existing surfaces
We risked breaking out the side of the path so used 10mm Ramset galvanised anchor studs and adhesive instead
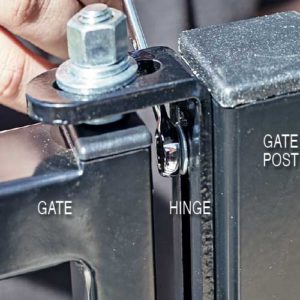
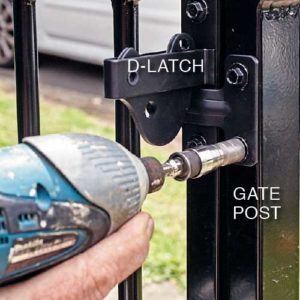
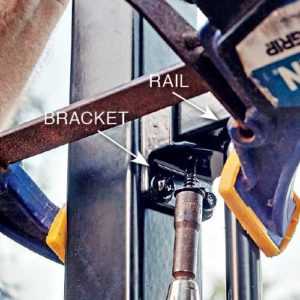
Install the fence