How To Clad A Timber Shed

Give a rundown shack new cladding to turn it into a smart workshop.
The old cedar weatherboards on this shed were starting to split and fall off, exposing the framework to the elements.
Not only unsightly, the damaged boards also posed a risk of serious structural damage. Exterior surfaces need to be in good condition and have a suitably impervious finish to protect the studs and insulation from rain and sun.
Sometimes, minor damage can be repaired using two-part timber filler or by replacing a section of board, but if the cladding is badly compromised then it will need to be replaced entirely.
The sarking on this shed was still in good condition so it was decided to remove the cladding and simply secure new primed weatherboards directly in place of the old ones.
For a job like this the first step is to use a pry bar to lever off the boards, working your way down from the top. buying new boards
To calculate the total area of wall to be covered, multiply the length by the height of each wall to obtain the number of square metres.
Then multiply the length by the height of each window and door and deduct the total area of the openings from the wall area.
Take the measurements to your cladding supplier, tell them which profile you prefer and they will calculate the total linear metres
you need, allowing for wastage.
The boards used for this project were primed Baltic pine, which comes in 5.4 metre lengths at about $3 a metre, from Bunnings.
Care and maintenance
Keep your new cladding in tiptop condition by regularly taking the time to perform these minor jobs.
EXAMINE THE BOARDS once a year, using a screwdriver or an awl to prod any spots on the boards that show signs of rot and determine the depth
of the damage. Scrape away decayed timber and fill the cavity with two-part filler such as Turbo Builder’s Bog.
WASH THE CLADDING every spring or summer by wetting the boards with
a garden hose then scrubbing off the dirt using a long-handled brush.
BLAST OFF TOUGH STAINS if the timber is very dirty using a pressure washer. You can also mix together
one litre of household bleach and 70ml of detergent in three litres of warm water and use it to scrub the boards, rinsing off with a garden hose.
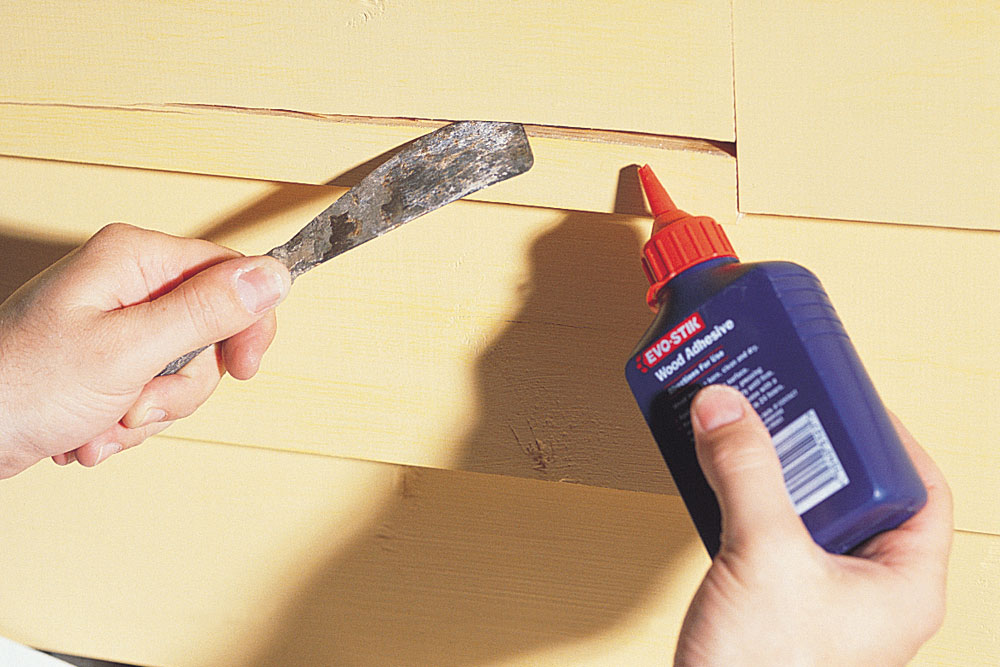
REPAIR SPLITS as soon as you spot them in any boards to prevent water from seeping in. Gently lever the split
open with a putty knife and if it is wide enough, tap a thin timber
wedge under the base edge of the damaged board to keep the inside of the split exposed.
Apply exterior PVA adhesive along the edge of the split then remove the wedge and push the board back in position, wiping off excess adhesive.
TIP Use duct tape to hold the repair together while the adhesive dries.
Four ways to secure boards
There are several ways to nail boards in position when installing timber cladding, but the framework behind them usually consists of timber studs wrapped in waterproof sarking secured using specialty metal fasteners or simply stapled to the framework of the wall. Here are four methods for securing boards to a timber framework.
Single fixed
These boards are secured by nails driven through their faces at the base and just above the top of the board below. The nail should not pass through the board beneath.
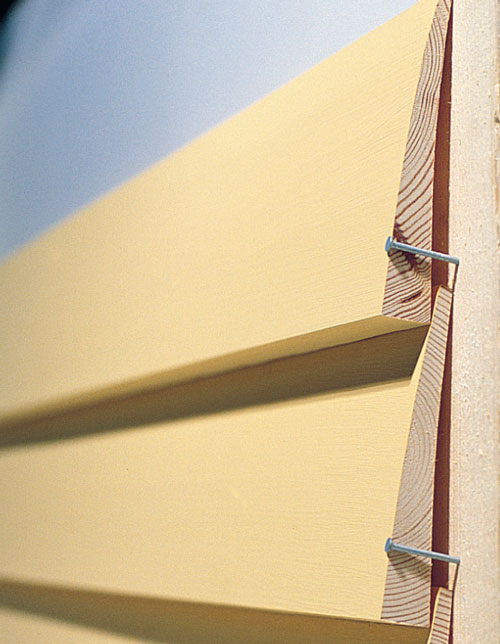
These boards are secured by nails driven through their faces at the base and just above the top of the board below
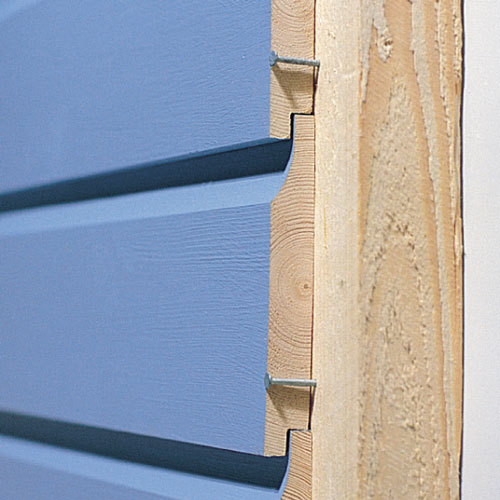
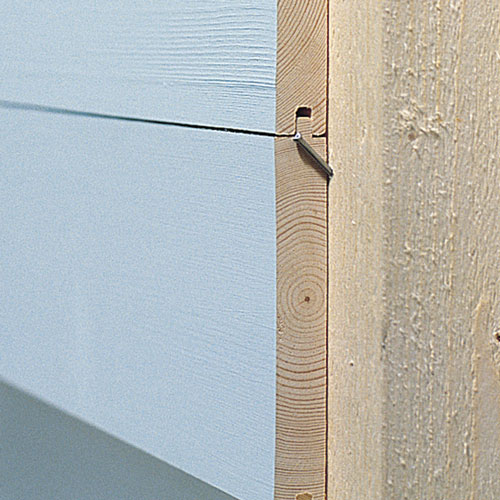
Hidden nail
A neat solution, hidden nailing is when boards are nailed at the top edge, so that the nail is covered by the board above. This method is only recommended for narrow boards.
The hidden nail method is only recommended for narrow boards
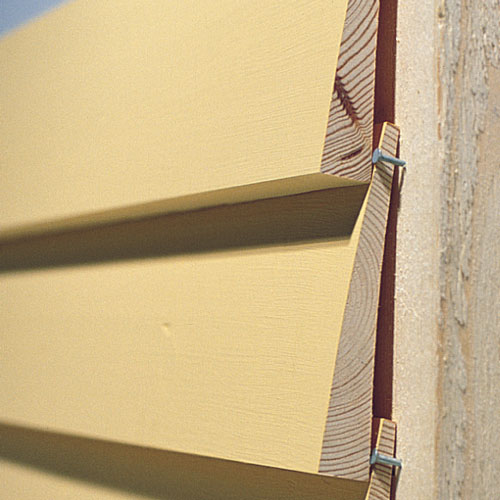
Shiplap
Positioned flat against the wall, shiplap boards have a notched base edge that fits over the board below. Nail the boards 20mm above the notch to lap it tightly to the board below.
Positioned flat against the wall, shiplap boards have a notched base edge that fits over the board below
Tongue and groove
These types of boards interlock to create a flat panel. Each tongue-and-groove board is secret nailed by securing a nail down at an angle through the top edge of the tongue.
These types of boards interlock to create a flat panel
How to clad a timber shed


