How To Build A Self-Watering Timber Garden Planter
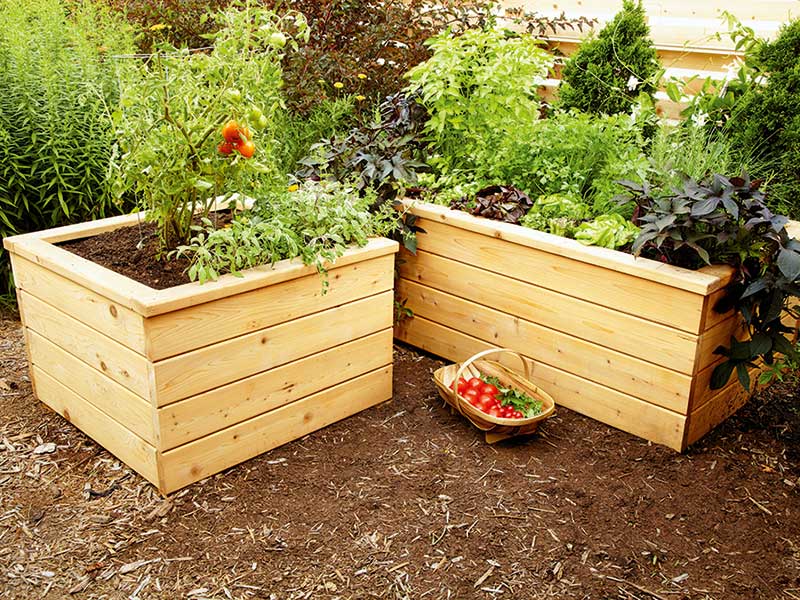
Build a self-watering raised bed from treated pine to grow salad greens.
Everyone loves to grow fresh salad greens, tomatoes and herbs. But backyard crops need regular water to thrive. Too much or too little can result in problems like rot, wilt and split fruit.
A weekend away can be enough to kill off a thriving vegie patch if there’s no-one around to do the watering.
To avoid the problem of withered crops, build these self-watering timber planters and use them to grow edibles.
Not only do they look good, but they also keep animals at bay and you can leave them for weeks on end without having to worry about water.
How they work
These self-watering planters are also called sub-irrigated planters, or SIPS, because they allow the plants to sip water whenever they want.
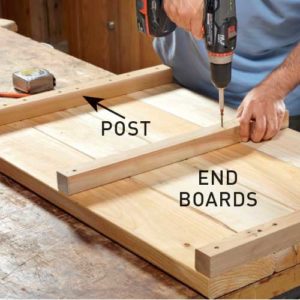
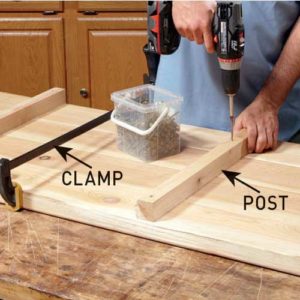
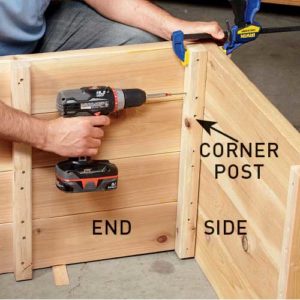
Built as a box with posts and a floor attached to joists, the timber used is MGP10, F7, H3 treated pine, as it’s long lasting for outdoor use in exposed situations above ground.
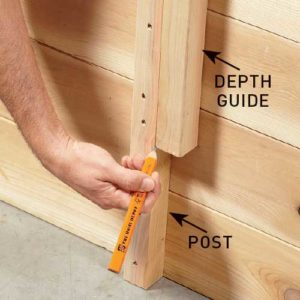
Cut lengths of 70 x 35mm timber in half using a circular saw and fence guide to make the posts.
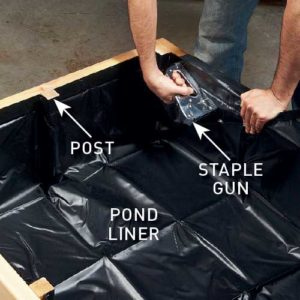
When the box is ready, add a pond liner to retain water, then position the socked agricultural pipe and fill with soil mix. The secret to the success of these raised beds lies in the use of the socked agricultural pipe.
Once you fill the agricultural pipe reservoirs, they allow air to circulate and water to wick up to the roots of the plants whenever needed.
Watering plants from below means the roots stay moist and there’s less evaporation, so you don’t need to water as much.
TIP The clear plastic tube allows any overflow water to drain away.
Garden saver
Here are the top reasons to build a planter box for growing edibles.
1. It saves your back and knees.
2. You’ll have fewer weeds.
3. The simple sub-irrigation system saves water.
4. Have fresh food year-round.
5. You can create the soil mix.
6. Crops are safer from animals.
7. It can go in a yard or on a deck.
Planting a raised bed
To set up and maintain the raised garden bed, follow these guidelines. And for more great ideas on using sub-irrigated planters (SIPS), visit Inside Urban Green.
CHOOSE a spot that gets at least six hours of sun each day. If a planter is against a wall, you can get by with less sun because of reflected heat.
LINE the planter with a rubber pond liner to prolong the life of the treated pine and prevent chemicals leaching into the soil.
USE a light, fluffy soil mix that retains moisture without becoming compacted or waterlogged. Improve the soil mix with perlite. It forms spaces so water moves freely through the root system.
MULCH the planters to keep weeds down and slow evaporation.
TIP Perlite is ideal for use in propagation, hydroponics and container gardens.
How to build a self-watering timber planter