How To Build A Concrete Table
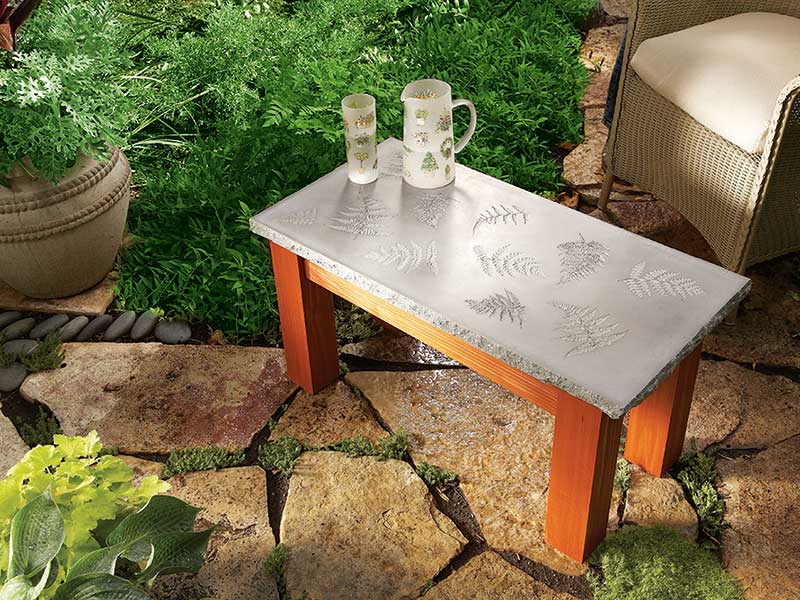
Stone garden furniture is timeless, but it can be pricey.
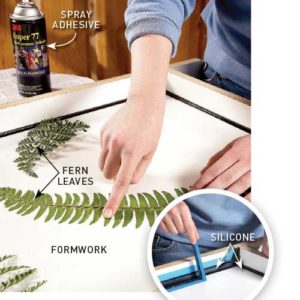
This table has a concrete top featuring fern leaf imprints, which is supported on a solid timber base and assembled using dowel joints.
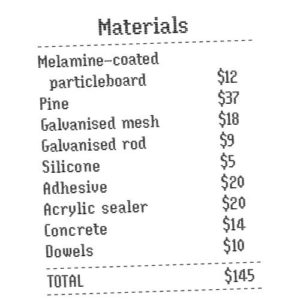
This top costs about $60 to DIY, which includes the formwork and reinforcement, but the total cost will vary with the timber used for the base.
It needs to be exterior grade and the type has to suit the finish. Go for clear treated pine if staining and finger-jointed H3 LOSP pine if painting.
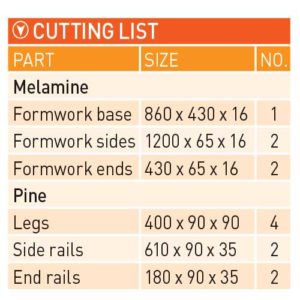
The formwork for the tabletop is made from melamine-coated particleboard so it is easy to remove once the concrete has cured.
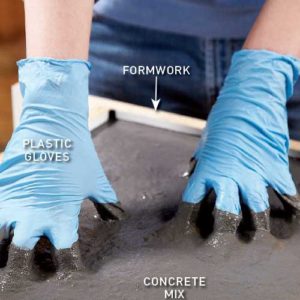
A tabletop slab needs strength, a low shrinkage rate and a long cure time. Use a high-strength concrete mix, add a layer of galvanised light gauge steel mesh and reinforce it with three 8mm galvanised threaded rods.
Shrinkage and cracking is usually caused by excess water, so keep the mix as dry as possible but still workable.
Allow the concrete slab to harden for at least two days, keeping it moist and covered in plastic. To prevent staining, and to give a glossy finish, apply 2-3 coats of an acrylic sealer.
DESIGN TIP Try inlaying decorative objects like seashells, coloured glass, tiles or even coins in the top.
Build the base
Cut the legs and rails to length with a mitresaw, then drill dowel holes and assemble the frame using 50 x 10mm dowels and exterior PVA adhesive, pulling it tight with sash clamps.
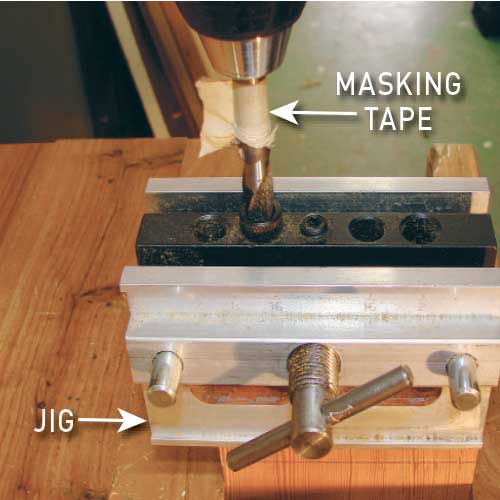
TIP Use masking tape around the drill bit as a depth guide.
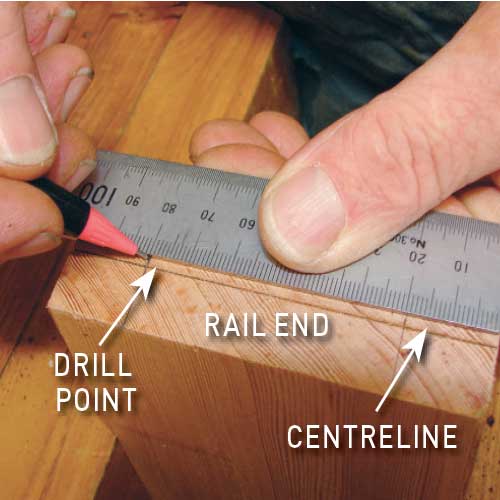
Step 1. Set out rail centres
Set out the rail centres on the ends of all four rails, marking vertical centrelines and hole locations for the dowels 15mm in from each edge along the marked lines.
Step 2. Drill the dowel holes
Drill the dowel holes by clamping the rails in a vice and using a dowelling jig with a 10mm diameter brad point bit to drill holes 27mm
deep at each marked position.
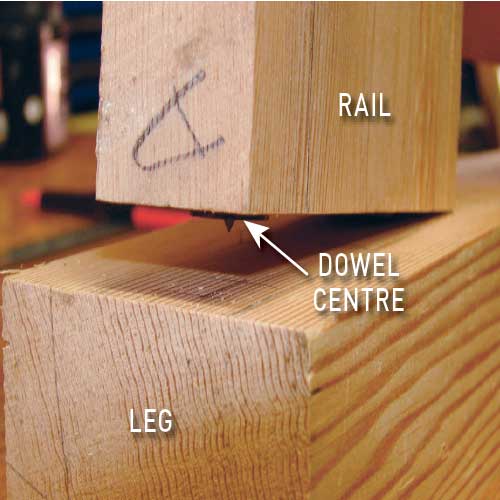
Step 3. Transfer the hole locations
Transfer the locations to the legs using dowel centres so the rails are set 12mm down from the top edge. Drill the holes, then test-fit. Apply adhesive and tap in the dowels.
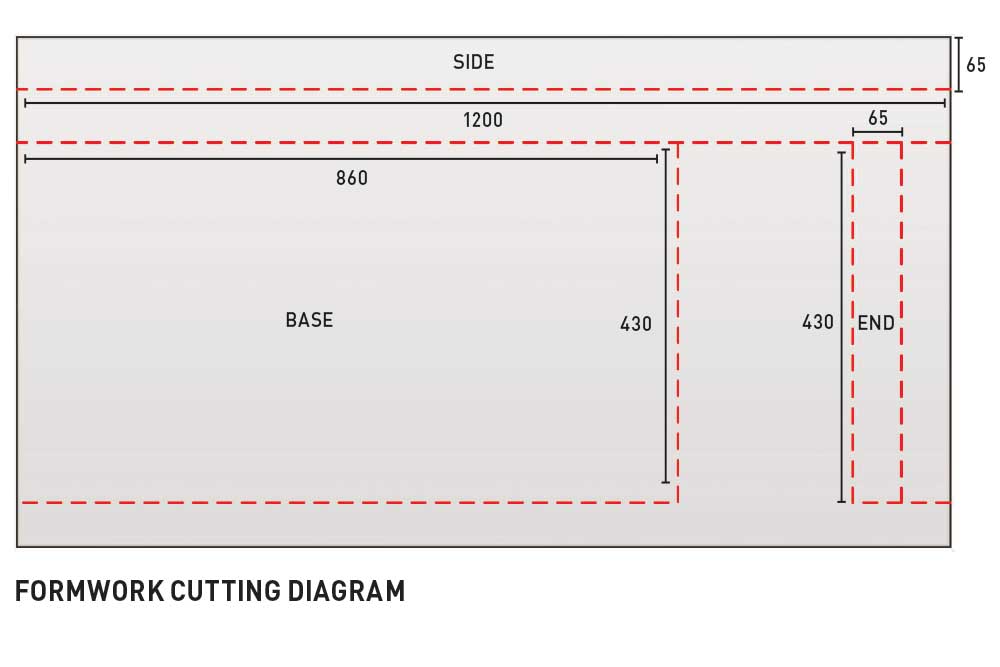
Building the formwork
Melamine-coated particleboard is an ideal material for formwork as it’s inexpensive, smooth and water-resistant. It costs about $12 for a 1200 x 600 x 16mm sheet.
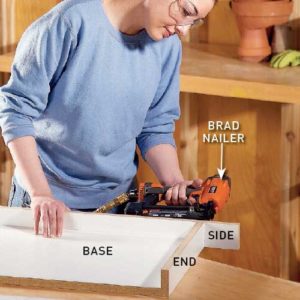
Cut the formwork pieces using a tablesaw or circular saw with a straightedge guide. The two sides are cut to extend beyond the ends for easy removal.
Use a brad nailer or drive screws by hand, drilling pilot holes. Seal the inside corners using silicone to give the cast rounded edges.
TIP To spot smudges during the clean-up, use dark silicone.
Make the concrete tabletop