Build A Space Saving Workbench
Most of us have a single car garage which means our workspace has to double as a parking area. If that’s the case at your place then this is the bench for you.
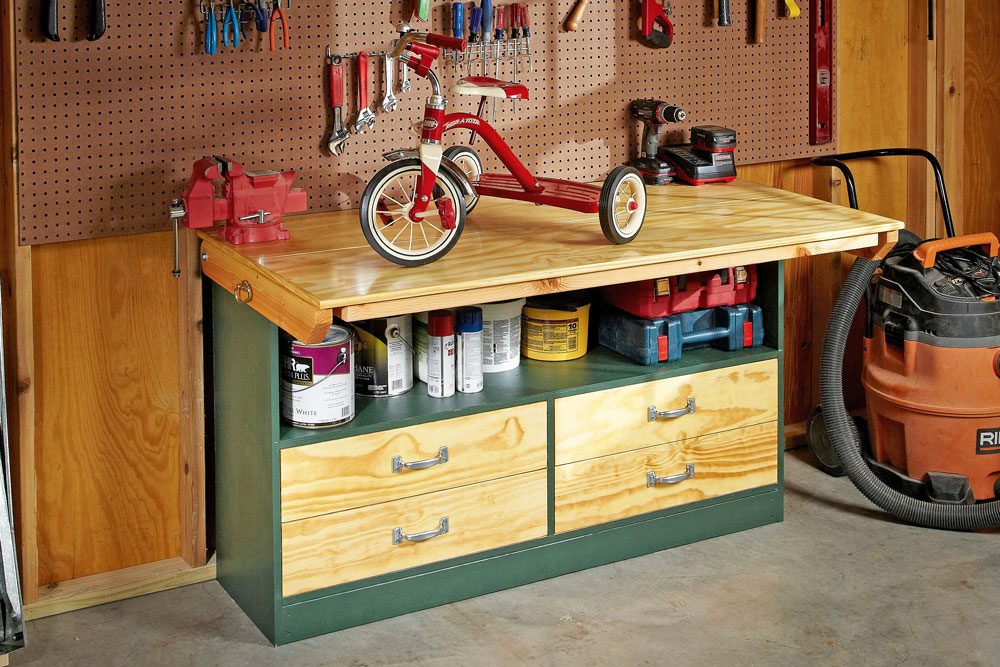
At 400mm wide this bench can be positioned against a wall and when the car is out of the way it opens up to a generous 1540 x 800mm worktop.
The front half of the benchtop is hinged and simply lifts up, with pivoting support arms that are held
in position by removable ring bolts.
It has an underbench shelf that’s handy for keeping power tools and also large enough for paint tins, plus four drawers for storing DIY materials.
Made from plywood with a pine frame, the benchtop and drawer faces are finished with clear polyurethane and the rest with green acrylic paint.
TIP Hang a pegboard over the bench to keep hand tools within easy reach.
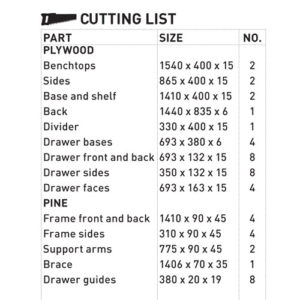
Cut the components
The bench is cut from two sheets of 15mm thick CD plywood with the bench back and drawer bases cut from 6mm plywood.
Have the components cut to size by your supplier or use a circular saw and straightedge guide.
The bench frames are cut from 90 x 45mm pine with the 20 x 19mm drawer guides cut along the grain from an offcut of 90 x 19mm pine.
Make sure you select the sheets of CD plywood carefully, as it is not an appearance-grade product. The knots and any defects are filled on the C side, so use it facing out.
Fasteners
Use PVA adhesive on all joints and assemble the frames with 75mm x 8g timber screws. Build the drawers and attach the fixed benchtop, base, shelf, sides and divider with 40mm x 8g timber screws. Add the support arms with coachscrews.
Secure the hinges to the folding top with 15mm x 8g screws and into the frame with 30mm x 8g screws. Attach the drawer bases, cabinet back and drawer guides with 30mm x 8g screws, using 25mm x 8g screws for the drawer faces and handles. Secure the brace with 45mm x 8g screws.
Folding the benchtop
The drop-down top means that when the bench isn’t in use it’s only 400mm wide and doesn’t encroach on valuable floorspace.
Butt hinges allow the top to swing up and down with support arms on the sides rotating to carry the weight of the top.
The arms are locked in position with ring bolts pushed through clearance holes.
TIP To secure the arms more positively, tap T nuts into the clearance holes and wind the ring bolts into them.