Build A Designer Day Bed

Build a luxury sofa to invest in some serious outdoor relaxation.
Garden dining settings and deck chairs have their place, but nothing tempts you outside like the prospect of a peaceful afternoon curled up on a supremely comfy, well-built day bed.
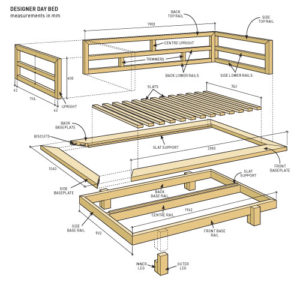
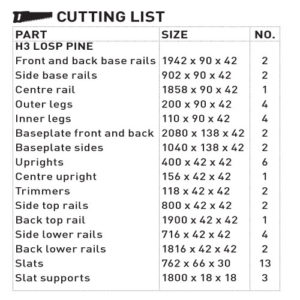
This simple project might be the most luxurious outdoor furniture you will ever own. It is built from primed H3 LOSP (light organic solvent preservative) finger-jointed pine, and is designed to fit a single mattress.
The timber is weatherproof but the mattress needs to be stored undercover. If you’d prefer to leave it exposed to the elements, alter the dimensions to fit an outdoor mattress of your choice.
TIP If you prefer a natural timber finish you can use hardwood instead of treated pine, but it will cost a lot more.
Make it simple
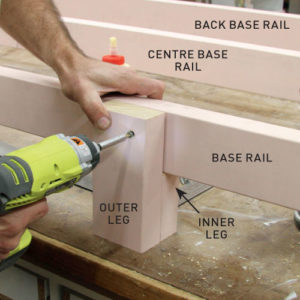
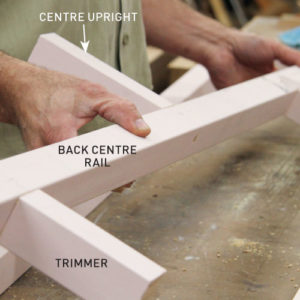
Joining legs to rails is a complex task, but we’ve made it simple by building each leg from an outer and inner piece.
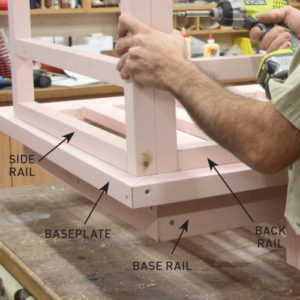
The inner leg is shorter by 90mm, equal to the width of the rail. This allows the base rail to sit on the inner leg and finish flush with the outer leg.
Cut the components with a sliding compound mitresaw, cutting 45º opposing mitres on the baseplates, base rails and top rails, and mitring the upper end of the uprights.
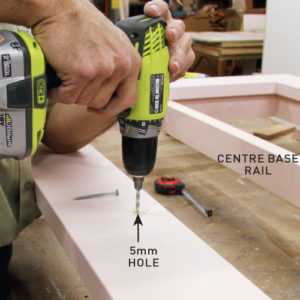
For a professional finish, fill the screw holes with two-part filler and sand with 120 grit abrasive paper before painting. We used matt black acrylic for an oriental look.
Fasteners
Use 65mm x 10g treated pine screws for the base frame, legs and centre rail. Attach the slat supports to the baseplates with 32mm x 8g screws.
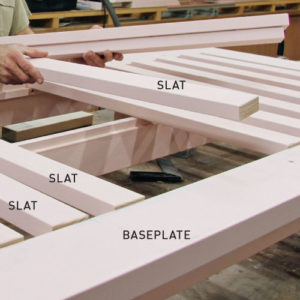
Secure the slats with 40 x 2mm nails, and use number 20 biscuits in the mitred baseplate joints to keep them all flush.
Keep the baseplates flush
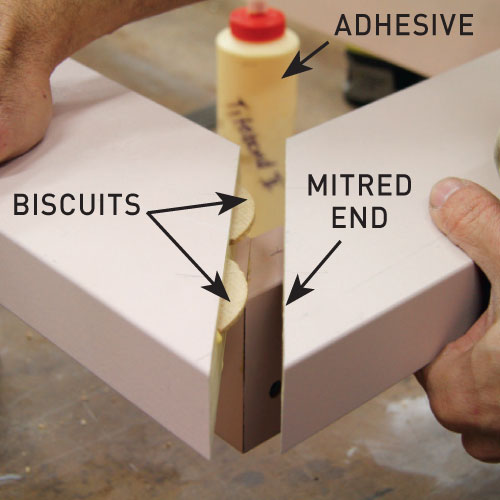
To keep the mitre-joined baseplates flush and neat, we used exterior PVA adhesive and number 20 biscuits.
Biscuits are oval-shaped fasteners made from pressed beech, and they are available in three different sizes.
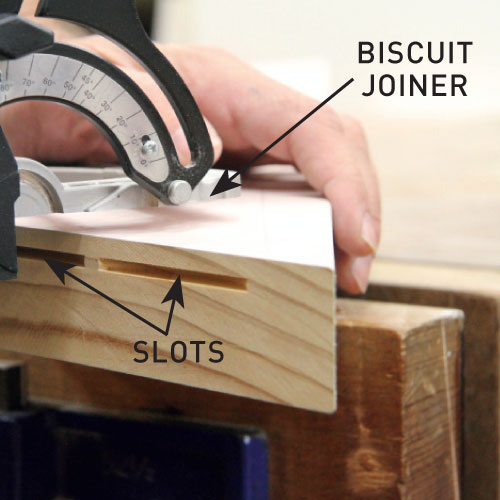
A biscuit joiner is a power tool that resembles a small angle grinder with an integrated fence that ensures the slots for the biscuits are located and cut precisely.
TIP Dowels could also be used to secure these joints.
Step 1. Cut two biscuit slots
Cut two biscuit slots in each mitred end of the baseplates. Take extra care not to make the slots too close to the long point of the mitre so that the blade doesn’t breach the outer face of the baseplates.
Step 2. Apply adhesive
Apply adhesive in the biscuit slots and over the entire surface of both mitres. Insert the biscuits into the slots and press the two mitred ends together. Reinforce each joint with two screws.
