Build A Courtyard Bench

Traditionally made of teak or cedar, a timber bench will last for years in the backyard.
This comfortable seat is made from LOSP H3 treated pine, making it more affordable. Before making the bench, select the boards carefully and avoid ones that are heavily knotted.
When cutting the timber to length on a mitresaw, work your way around any knots if possible. Use a tablesaw or circular saw and fence to cut the 140 x 25mm boards along the grain into 90, 70 and 50mm widths.
Round over all cut edges using 100 grit abrasive paper and reseal them with a treated timber product.
This seat is built to last and is surprisingly strong, with the base frame and legs well braced and blocked. The legs and rails are attached using biscuits and exterior PVA adhesive.
After the parts are cut and ripped to size, use a jigsaw to cut the curves on the seat rails and braces.
Drill the plug holes in the legs and lower end rails then use a biscuit joiner to cut the slots in the legs and rails.
Instead of using the adjustable fence to locate the slots, the workpiece and base of the biscuit joiner were positioned against the bench.
This means the slots aren’t always centred, so orientation is tracked with masking tape and centre marks.
Assemble the bench then sand all the surfaces using 180 grit paper.
Finish with two coats of furniture oil or timber stain and then apply a coat of clear polyurethane.
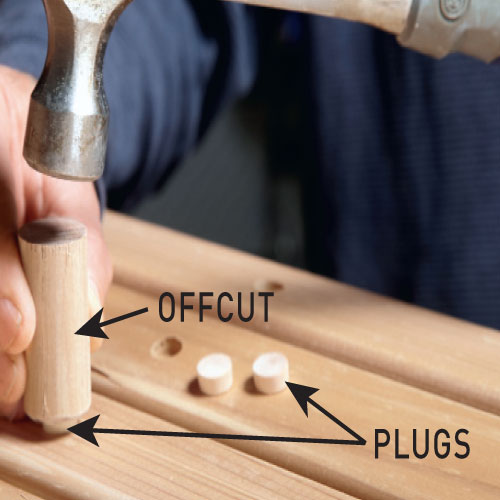
Hide the screw heads
The screw heads are embedded in plugholes cut before assembly using a 9.5 or 12.5mm Forstner bit and then covered with timber plugs.
TIP Use a drill press and 9.5 or 12.5mm plug cutter to make your own plugs.
Step 1. Drill plus recesses
Drill plug recesses using a Forstner bit, controlling the depth of the hole by drilling until the top of the cutter is flush with the surface.

Step 2. Cover screw heads
Cover screw heads by gluing flat-topped pine plugs into the plug recesses using a dowel offcut or timber block to hammer them flush.
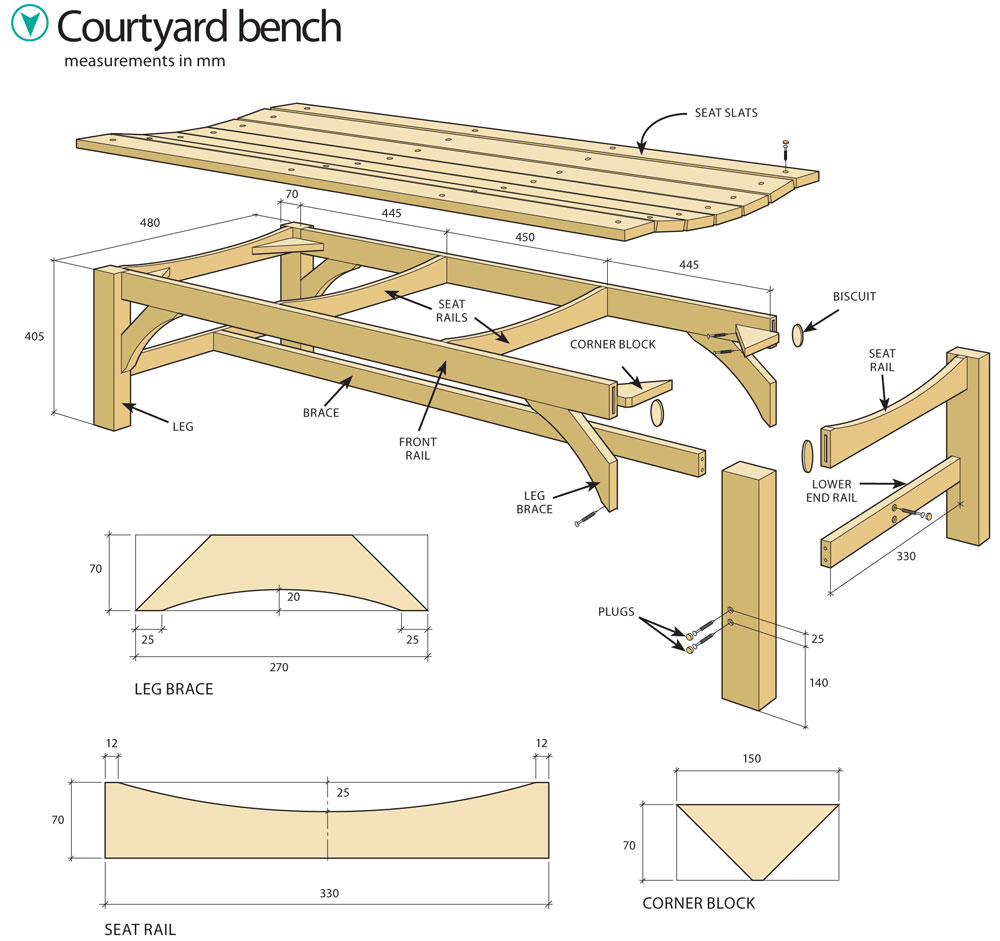
Diagrams
Follow these diagrams to build each element of this courtyard bench.
Build a courtyard bench


