Budget Laundry Renovation
A multi-functional utility room gets an overhaul to keep up with a busy family and maximise the floorspace.
When they first bought their coastal home, Handymanreaders Kate and Chad Griffith had already revamped the laundry as part of a total renovation.
But with a growing family, major extensions were on the agenda.
‘The laundry isn’t my favourite place to be, so I wasn’t wasting money or living space on it,’ says Kate.
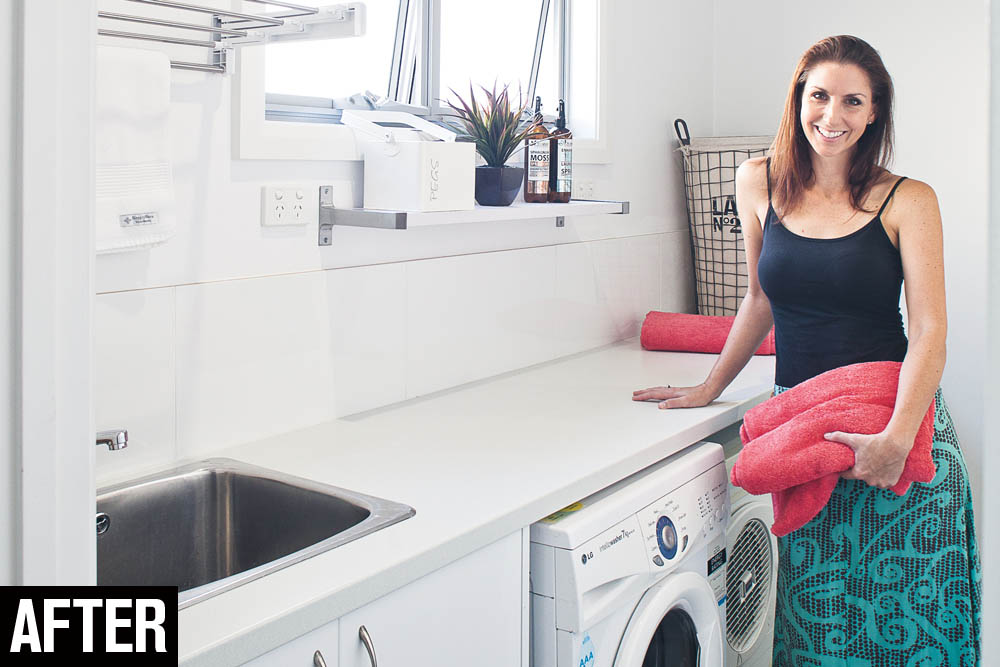
Compact but functional, the laundry is on the middle level of the three-storey house, near the side door for easy access to the clothesline.
It’s close to the kids’ bathroom and directly below the ensuite of the new parents’ retreat on the top floor.
‘With three kids generating most of the washing, it seemed sensible to keep it near their rooms, and we plan to install a laundry chute from our ensuite above,’ says Kate.
The laundry is a real utility room, housing the fuse box and manhole, and providing access to the upstairs plumbing, electrical and duct work.
The L-shaped room measures 2800 x 1600mm with a 1000mm return at one end. The long wall was fitted with cabinets and appliances, as well as hamper storage, and the return used to house a freezer.
Working to a tight budget meant recycling the old appliances.
‘I liked the idea of fitting the washer and dryer side by side under the bench. The sink was still in great shape, so we only needed a new tap.
‘With a family of five, I need space to sort clothes, so the long bench was perfect,’ says Kate.
Two powerpoints were positioned above the bench for everyday use and two under it for the appliances.
The double awning windows let in lots of light and air for the drying rack over the sink, and a wall shelf adds extra storage.
After the tradies had finished the wiring and pipework, the room was lined with plasterboard, then the cabinetry and painting done DIY.
The flatpack solution
Kate and Chad wanted to do part of the work DIY to save money, so they installed flatpack cabinets and a laminate benchtop from Kaboodle.
For the base cabinets, they chose White Gloss doors in the Modern profile, and a Coconut Ice benchtop.
The first job was to mark a level line on the wall, 870mm above the floor, for the top of the cabinets.
A stud finder was used to mark stud locations on the height line, so it was easy to see where the studs were even after the cabinets were in position.
‘The small space required exact measurements in order to fit two cabinets, the washer and dryer along the one wall,’ says Chad.
An 800mm base cabinet for the sink was installed in the corner by the door where the tap plumbing and floor waste outlet were. Chad drilled the plumbing holes in the cabinet.
‘The cupboard just fitted into position over the plumbing and we secured it to the wall,’ says Chad.
The second 400mm cabinet didn’t need plumbing holes but it was secured 400mm out from the corner to leave space for a hamper and to align with the wall stud spacings
Before being secured, the cabinets were levelled in both directions and the height corrected by winding the legs up or down, as needed.
A cleat was cut to length and secured between the cabinets to help support the 2800mm long benchtop that would run along the whole wall.
‘Getting the benchtop in was a challenge. It was such an exact fit between the walls and there wasn’t a lot of room to manoeuvre it, but we managed with a fair bit of wangling and a few helping hands,’ says Chad.
The sink was last and because they were recycling their old one, Kate and Chad had kept the original piece of benchtop to use as a template for cutting out the new sink hole.
‘Even though it’s small, the space is really functional and streamlined, and I absolutely love the big benchtop.
‘It’s still not my favourite room, but at least it makes the mountains of washing almost bearable!’ says Kate.
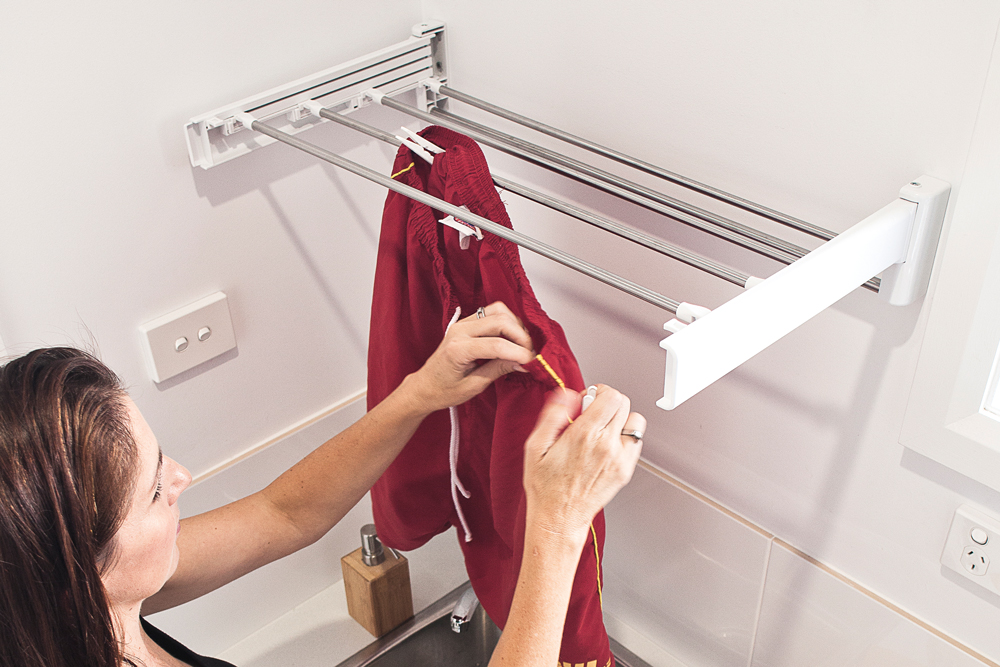 A wall-mounted drying rack over the sink saves floorspace in the small room
Install the cabinetry


